Discharge Instructions: Changing the Dressing on Your Midline Catheter
You are going home with a midline catheter. This small, soft tube has been placed in a vein in your arm. Where the catheter enters your body, it's covered with a bandage (dressing). This bandage may be made of clear (transparent) plastic or gauze. This helps to keep the area free of germs. You need to keep the dressing clean and dry to prevent infection. Only change the dressing if you or a caregiver has been told to do so. This sheet explains the process. Also be sure to follow any specific instructions you get from your healthcare provider.
When to change the dressing
Your healthcare team will tell you when to change your dressing. In general, change your dressing:
-
Every 5 to 7 days if you have a transparent dressing
-
Every 2 days if you have a gauze dressing
-
Any time the dressing becomes loose, dirty, or wet
Preventing infection
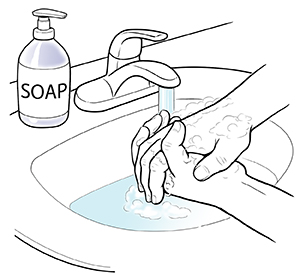
A midline catheter can let germs into your body. This can lead to an infection. To prevent infection, it's very important for you, your caregivers, and others around you to use good hand hygiene. This means washing your hands well with soap and clean, running water for at least 20 seconds. Or use an alcohol-based hand sanitizer to clean your hands. The sanitizer should contain at least 60% alcohol.
It's also important not to touch the catheter where it enters your skin. And be very careful to keep your work area and supplies clean.
Changing the dressing
Review the steps below and make sure you understand them. Ask your healthcare provider if you and your caregiver can perform the procedure before you are discharged to make sure that you understand what you are to do. If you’re not sure what to do or how to use your supplies, ask a member of your healthcare team before you try to change the dressing.
Note: Since a midline catheter is in your arm, you’ll only have one free arm during the dressing change. This makes it hard to change the dressing yourself. Have someone available to help you.
Step 1: Get prepared

Step 2: Remove the old dressing
-
Put on sterile gloves.
-
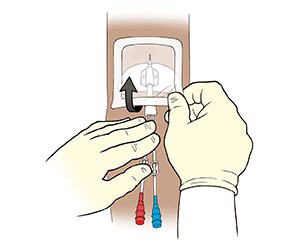
Peel the edges of the old dressing away from the skin. Hold the catheter and pull the dressing upwards. Place the old dressing in a trash bag.
-
If you are using a securement device, carefully remove it using the method your healthcare team showed you.
-
Check the exit site and the area around it. Call your healthcare team if you have any of the problems listed at the bottom of this sheet.

Step 3: Clean the site
-
Remove the gloves you wore in step 2 and throw them away. Wash your hands again and put on a new pair of sterile gloves.
-
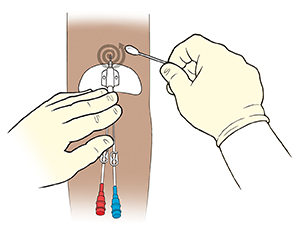
Clean around the exit site by going around in circles. Using the antimicrobial swab or sponge, start at the area closed to the site and go outward. Use a new cleaning swab and repeat this 3 times or for as many of the antimicrobial swabs in your kit. Let the site dry after each cleaning. Don’t fan the site or blow on it to help it dry.
-
Clean the catheter tube with an alcohol wipe, moving the wipe from the exit site to the end of the tube.

Step 4: Put on a new dressing
-
If you are using a securement device, apply it as you were shown.
-
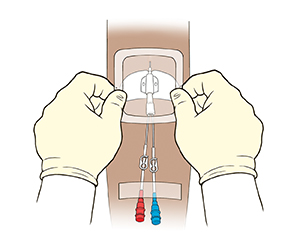
Apply the transparent or gauze dressing over the exit site. Seal all the edges of the dressing.
-
Roll up the catheter tubing loosely and tape it against your skin. Don’t tape on top of the dressing.
-
Throw away the old dressing and used supplies.
-
Remove your gloves and throw them away.
-
Wash your hands.

When to call the healthcare provider
Make sure you know what number to call with questions or problems, even on evenings, weekends, and holidays. Call your healthcare provider right away if you have any of the following:
-
Redness, swelling, pain, or drainage at the site.
-
Pain or swelling in your arm or shoulder
-
Trouble moving your arm
-
Bleeding at the catheter site
-
Temperature of 100.4°F (38°C) or higher, or as directed by your provider
-
Chills
-
Catheter that comes out, breaks, cracks, leaks, or has other damage
Online Medical Reviewer:
Mahammad Juber MD
Online Medical Reviewer:
Marianne Fraser MSN RN
Online Medical Reviewer:
Rita Sather RN
Date Last Reviewed:
8/1/2023
© 2000-2025 The StayWell Company, LLC. All rights reserved. This information is not intended as a substitute for professional medical care. Always follow your healthcare professional's instructions.